
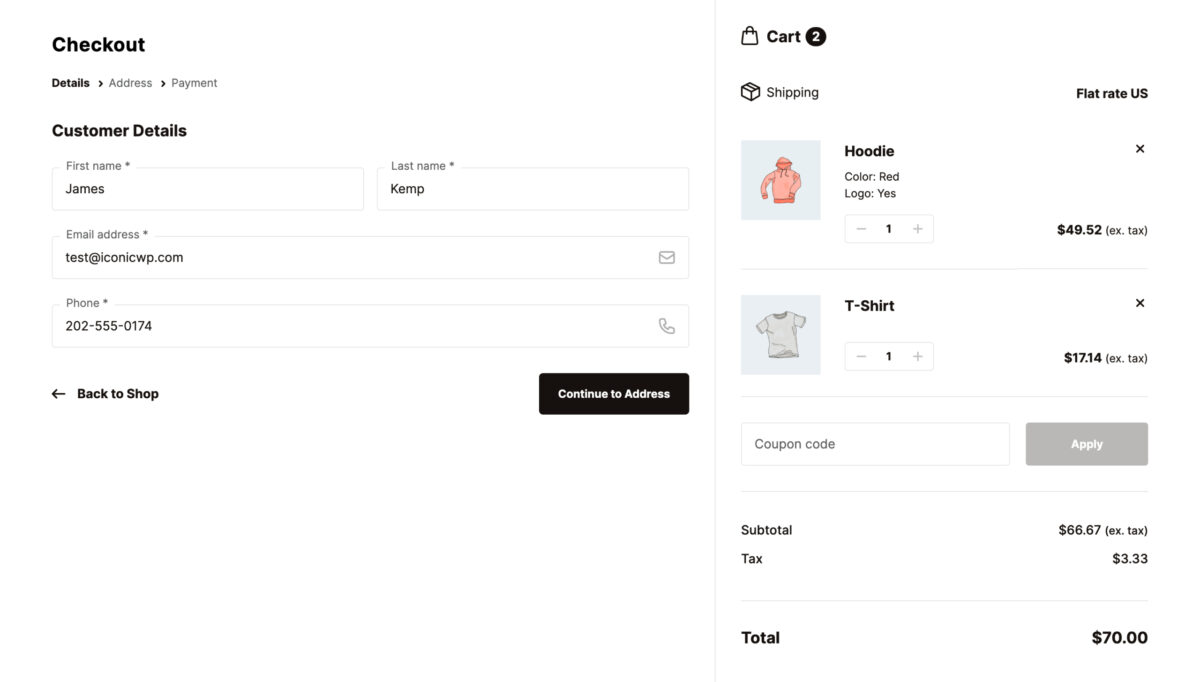
Multi-Step Checkout
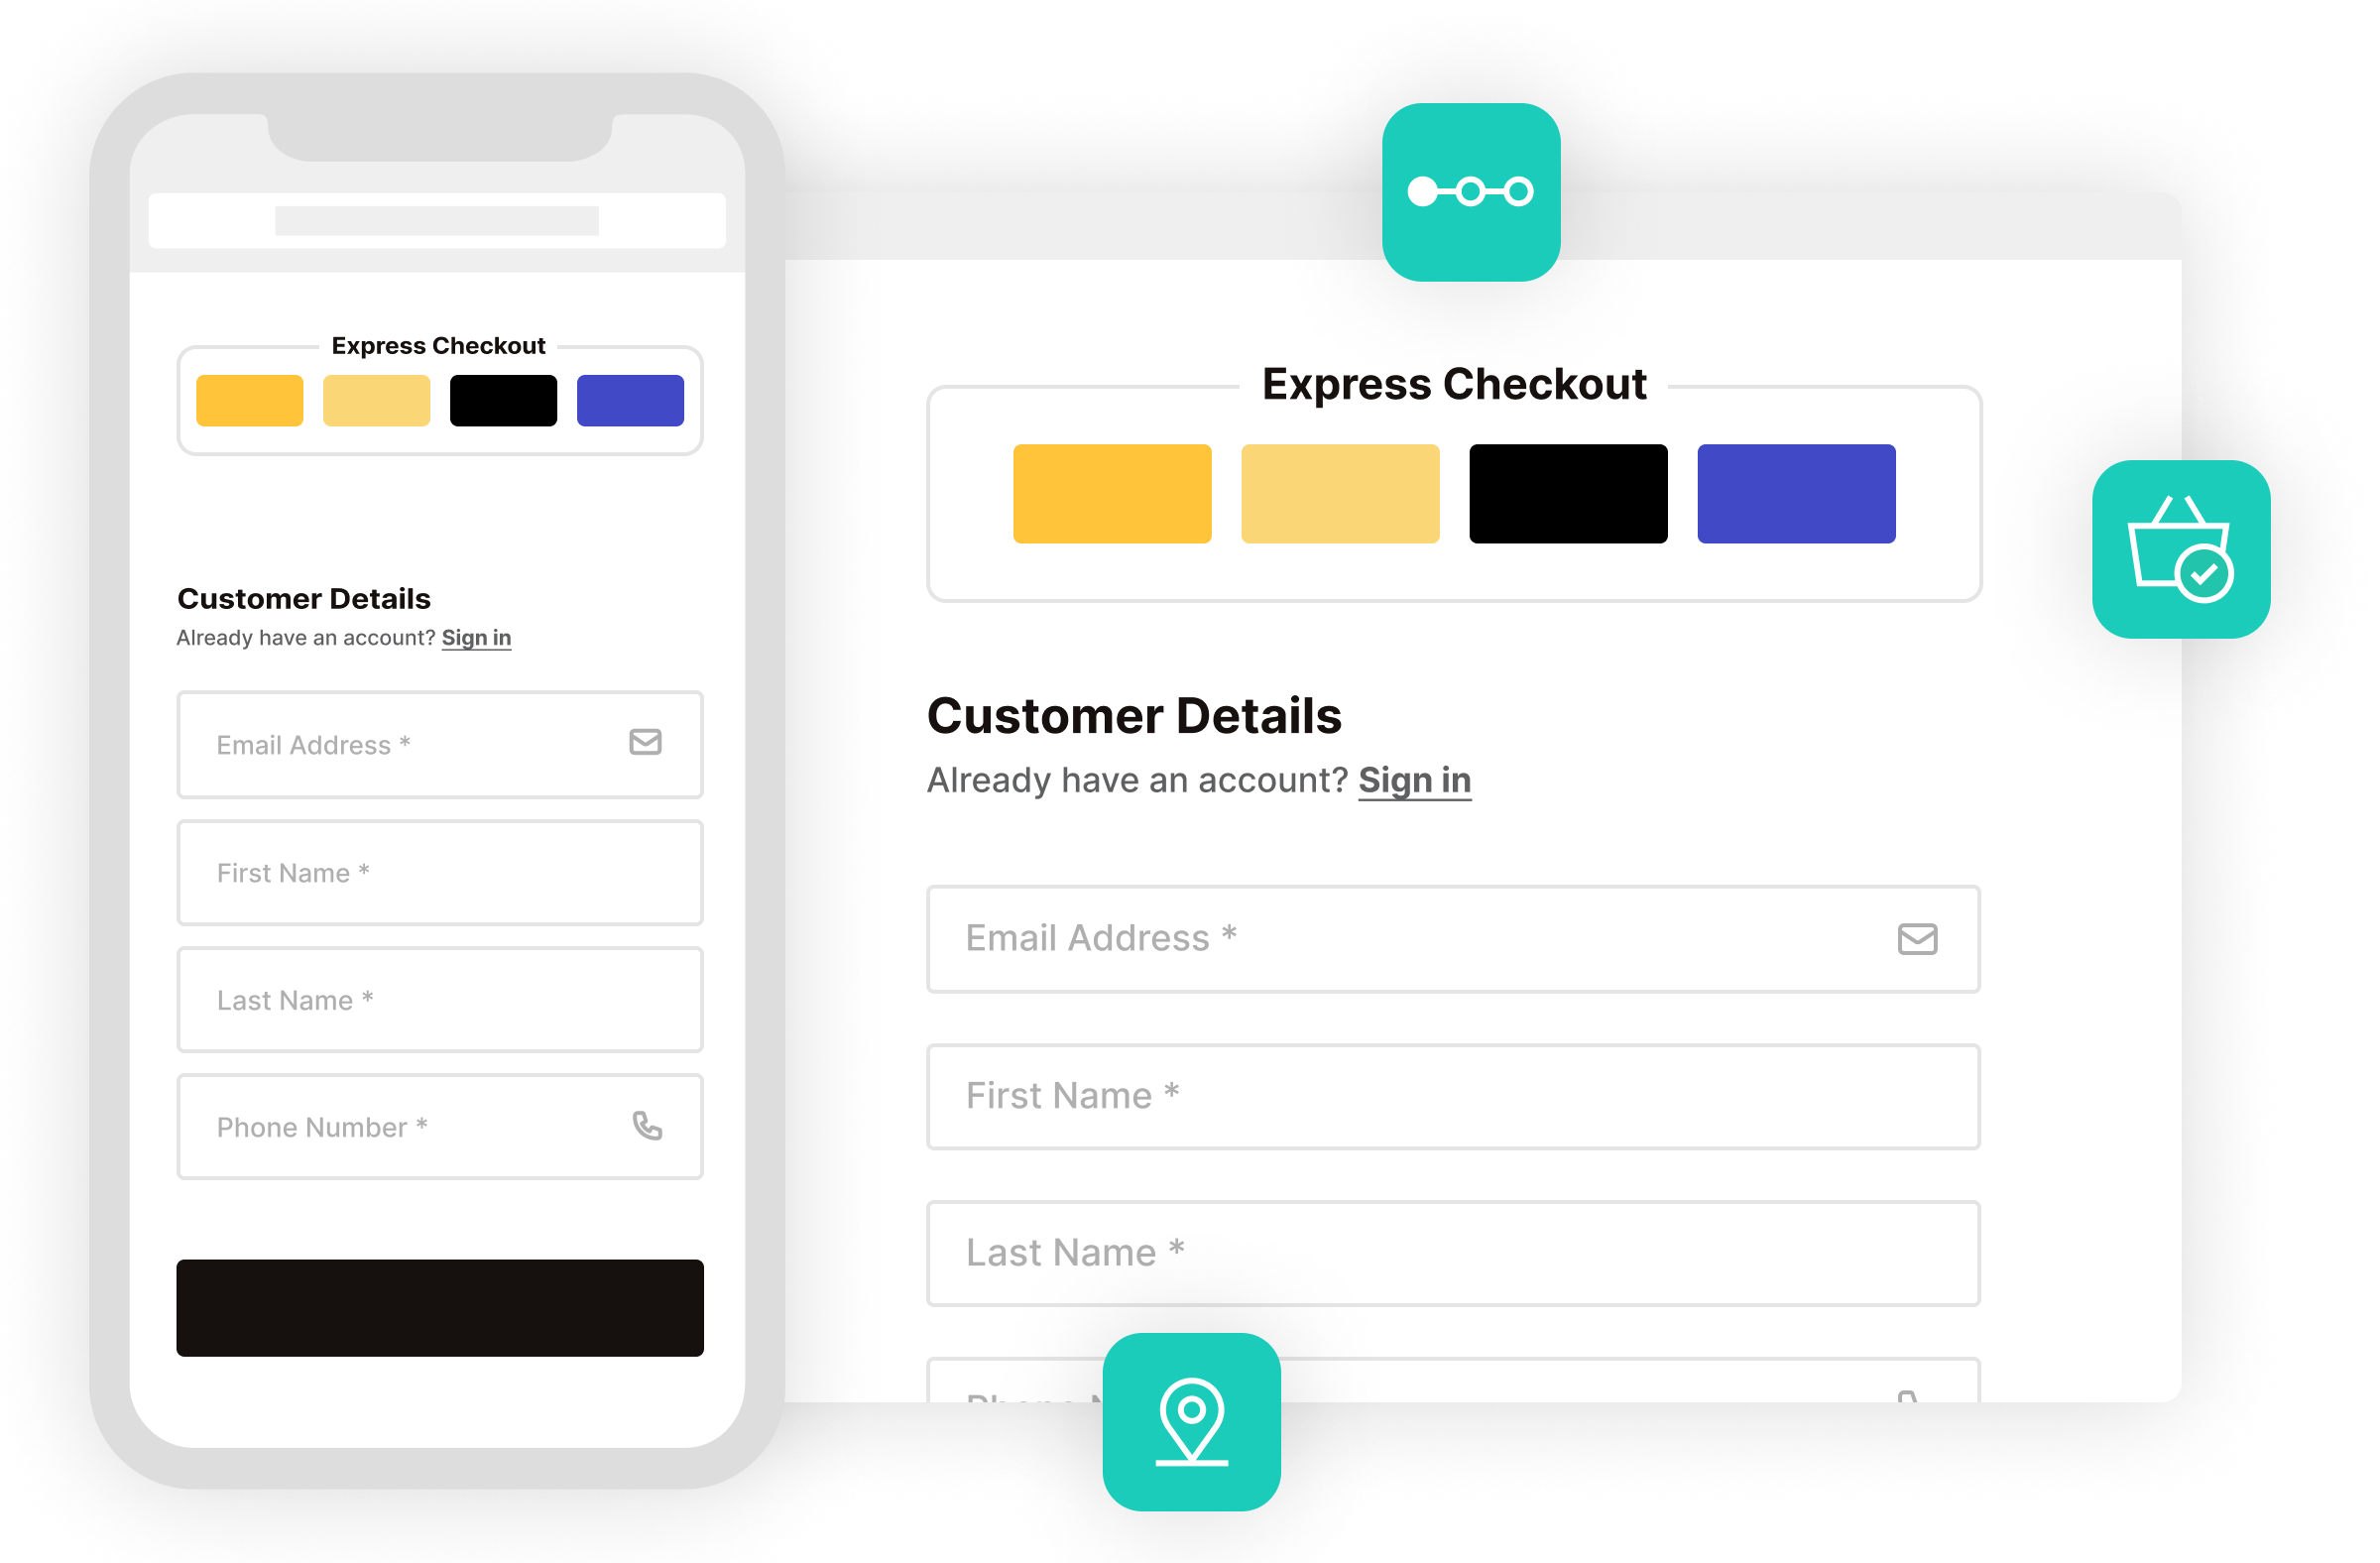
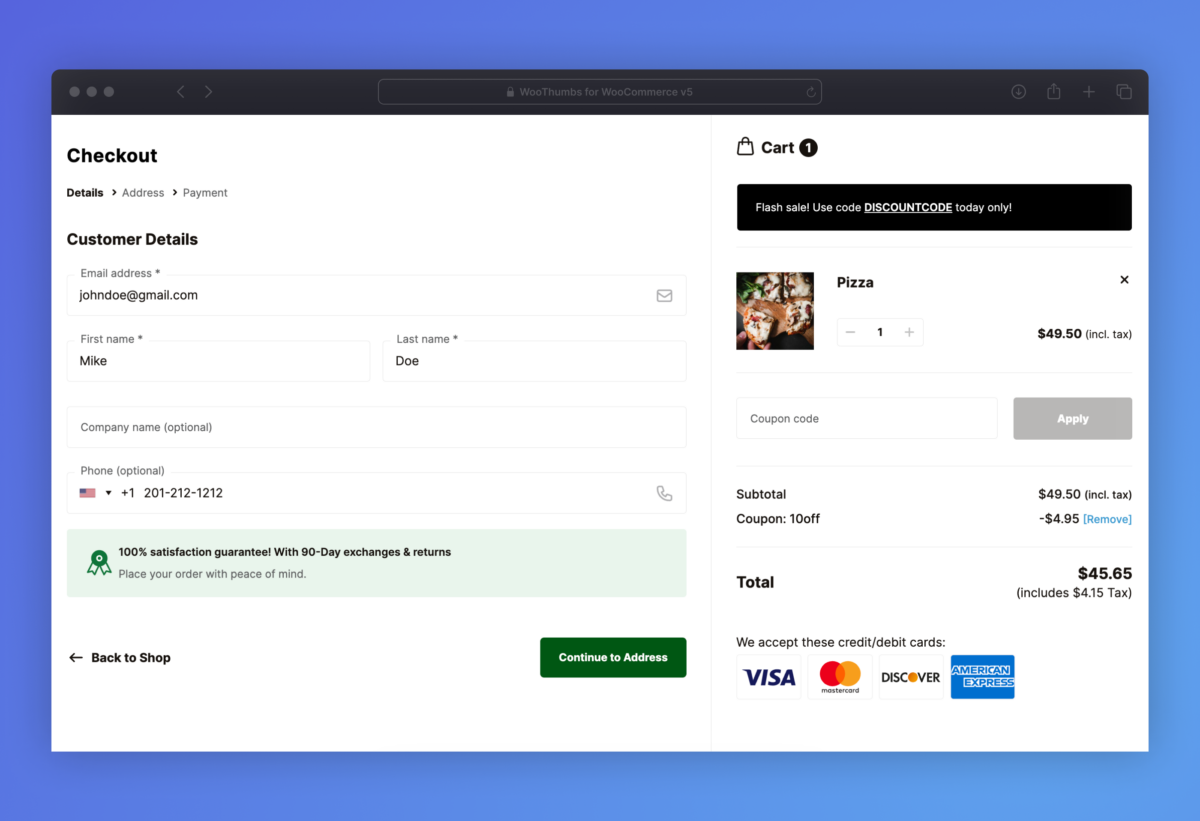
A Distraction Free Multi-Step Checkout
- Replace the default WooCommerce checkout with a checkout form that’s designed to increase conversions.
- Simplify your checkout process by optionally reducing the number of unnecessary additional fields. Such as the Company, Coupon, and separate Street Number checkout fields.
- Reduce checkout abandonment by keeping your checkout page free from distractions. Flux checkout removes all headers, footers, and sidebars so customers can focus on checking out.
I’ve definitely seen an increase in conversation rates when using this. It simplifies the checkout process for the customer.
David Keller Cobyda
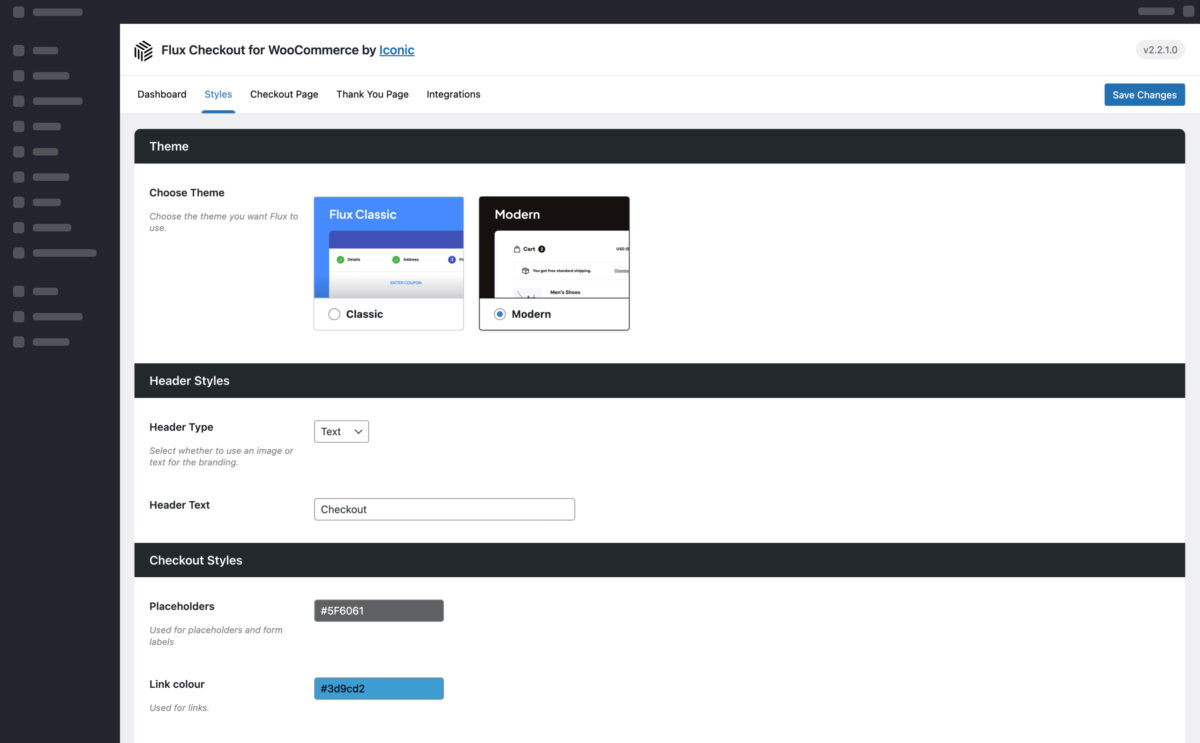
Checkout Design Themes
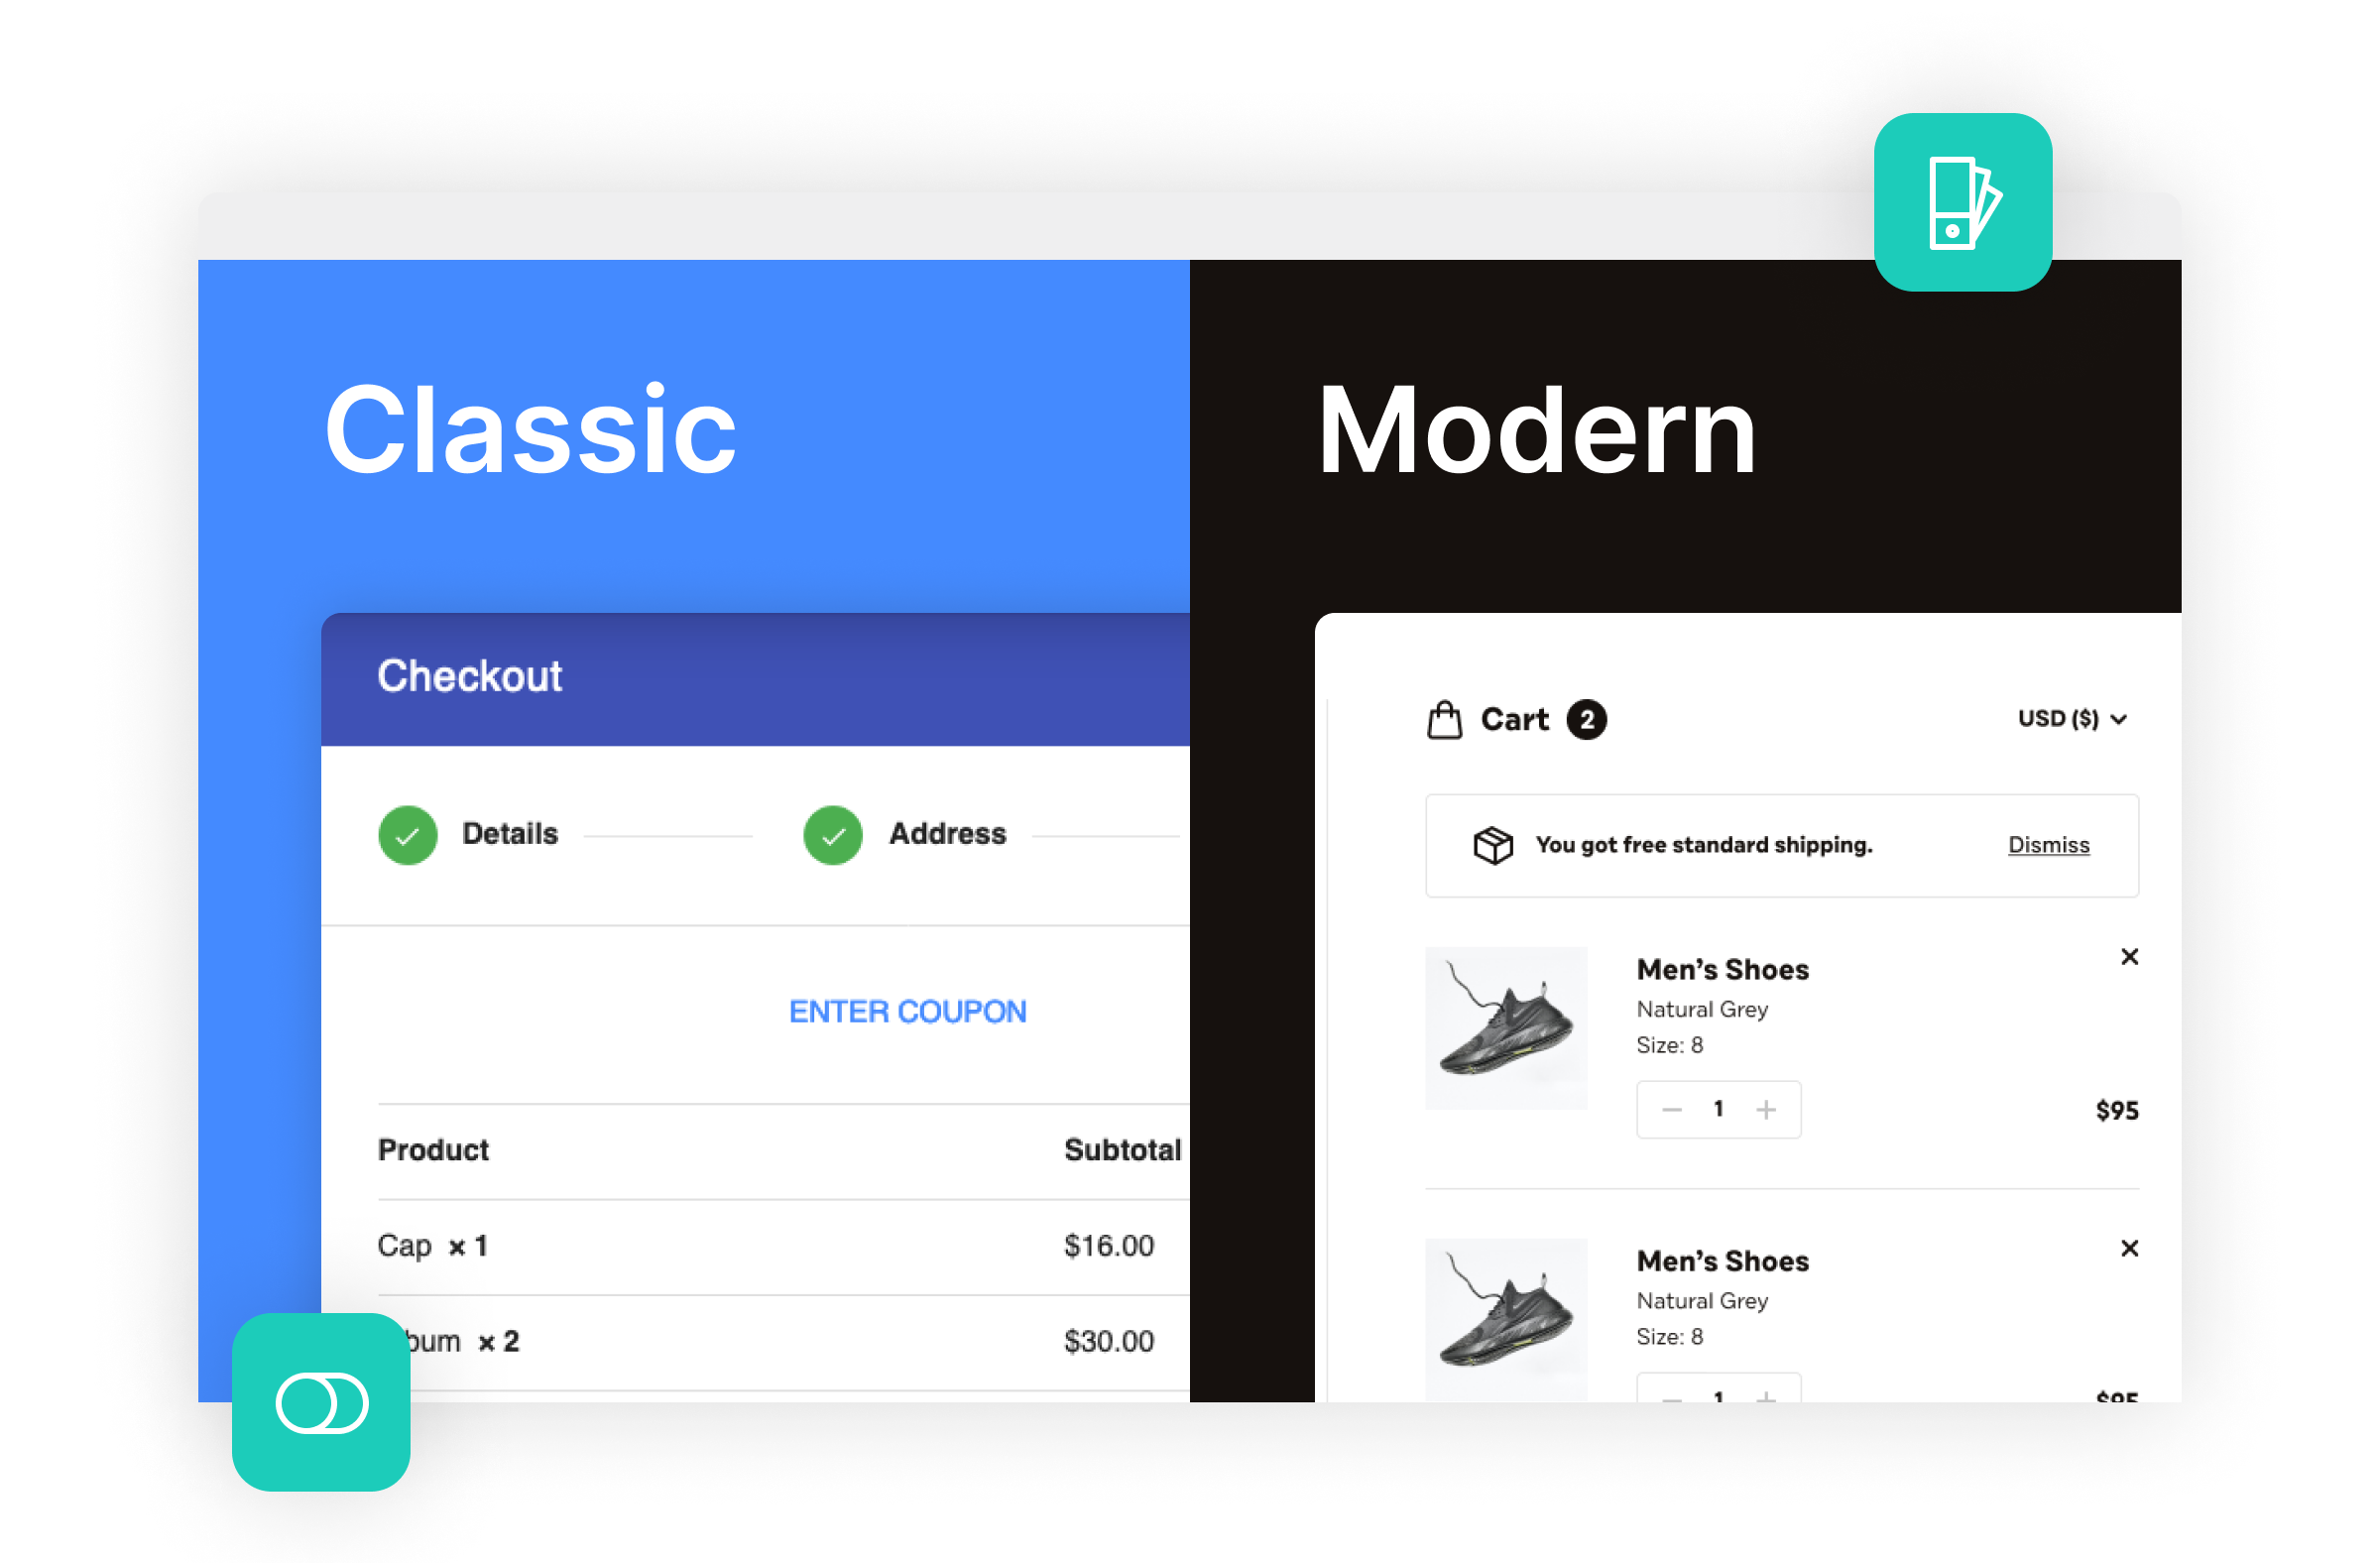
Your Checkout Style, Your Way
- Choose from our checkout style templates and have your WooCommerce checkout page blend seamlessly with your store.
- Switch between our optimized checkout designs in just one click.
- Customize each template’s style with our user-friendly settings.
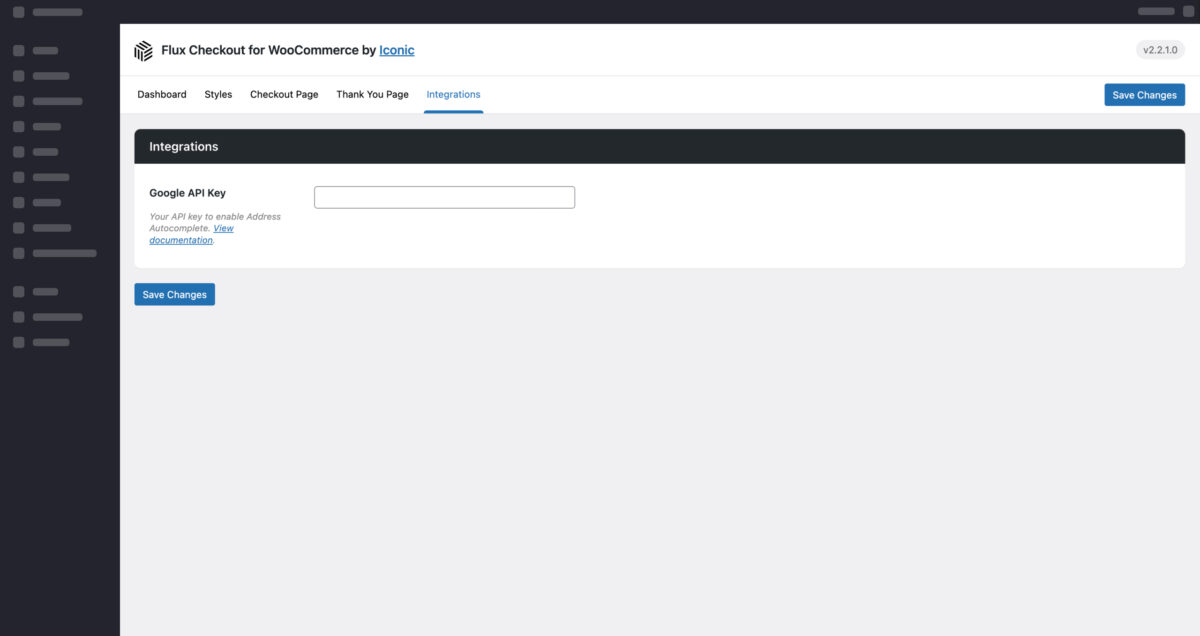
Address Autocomplete
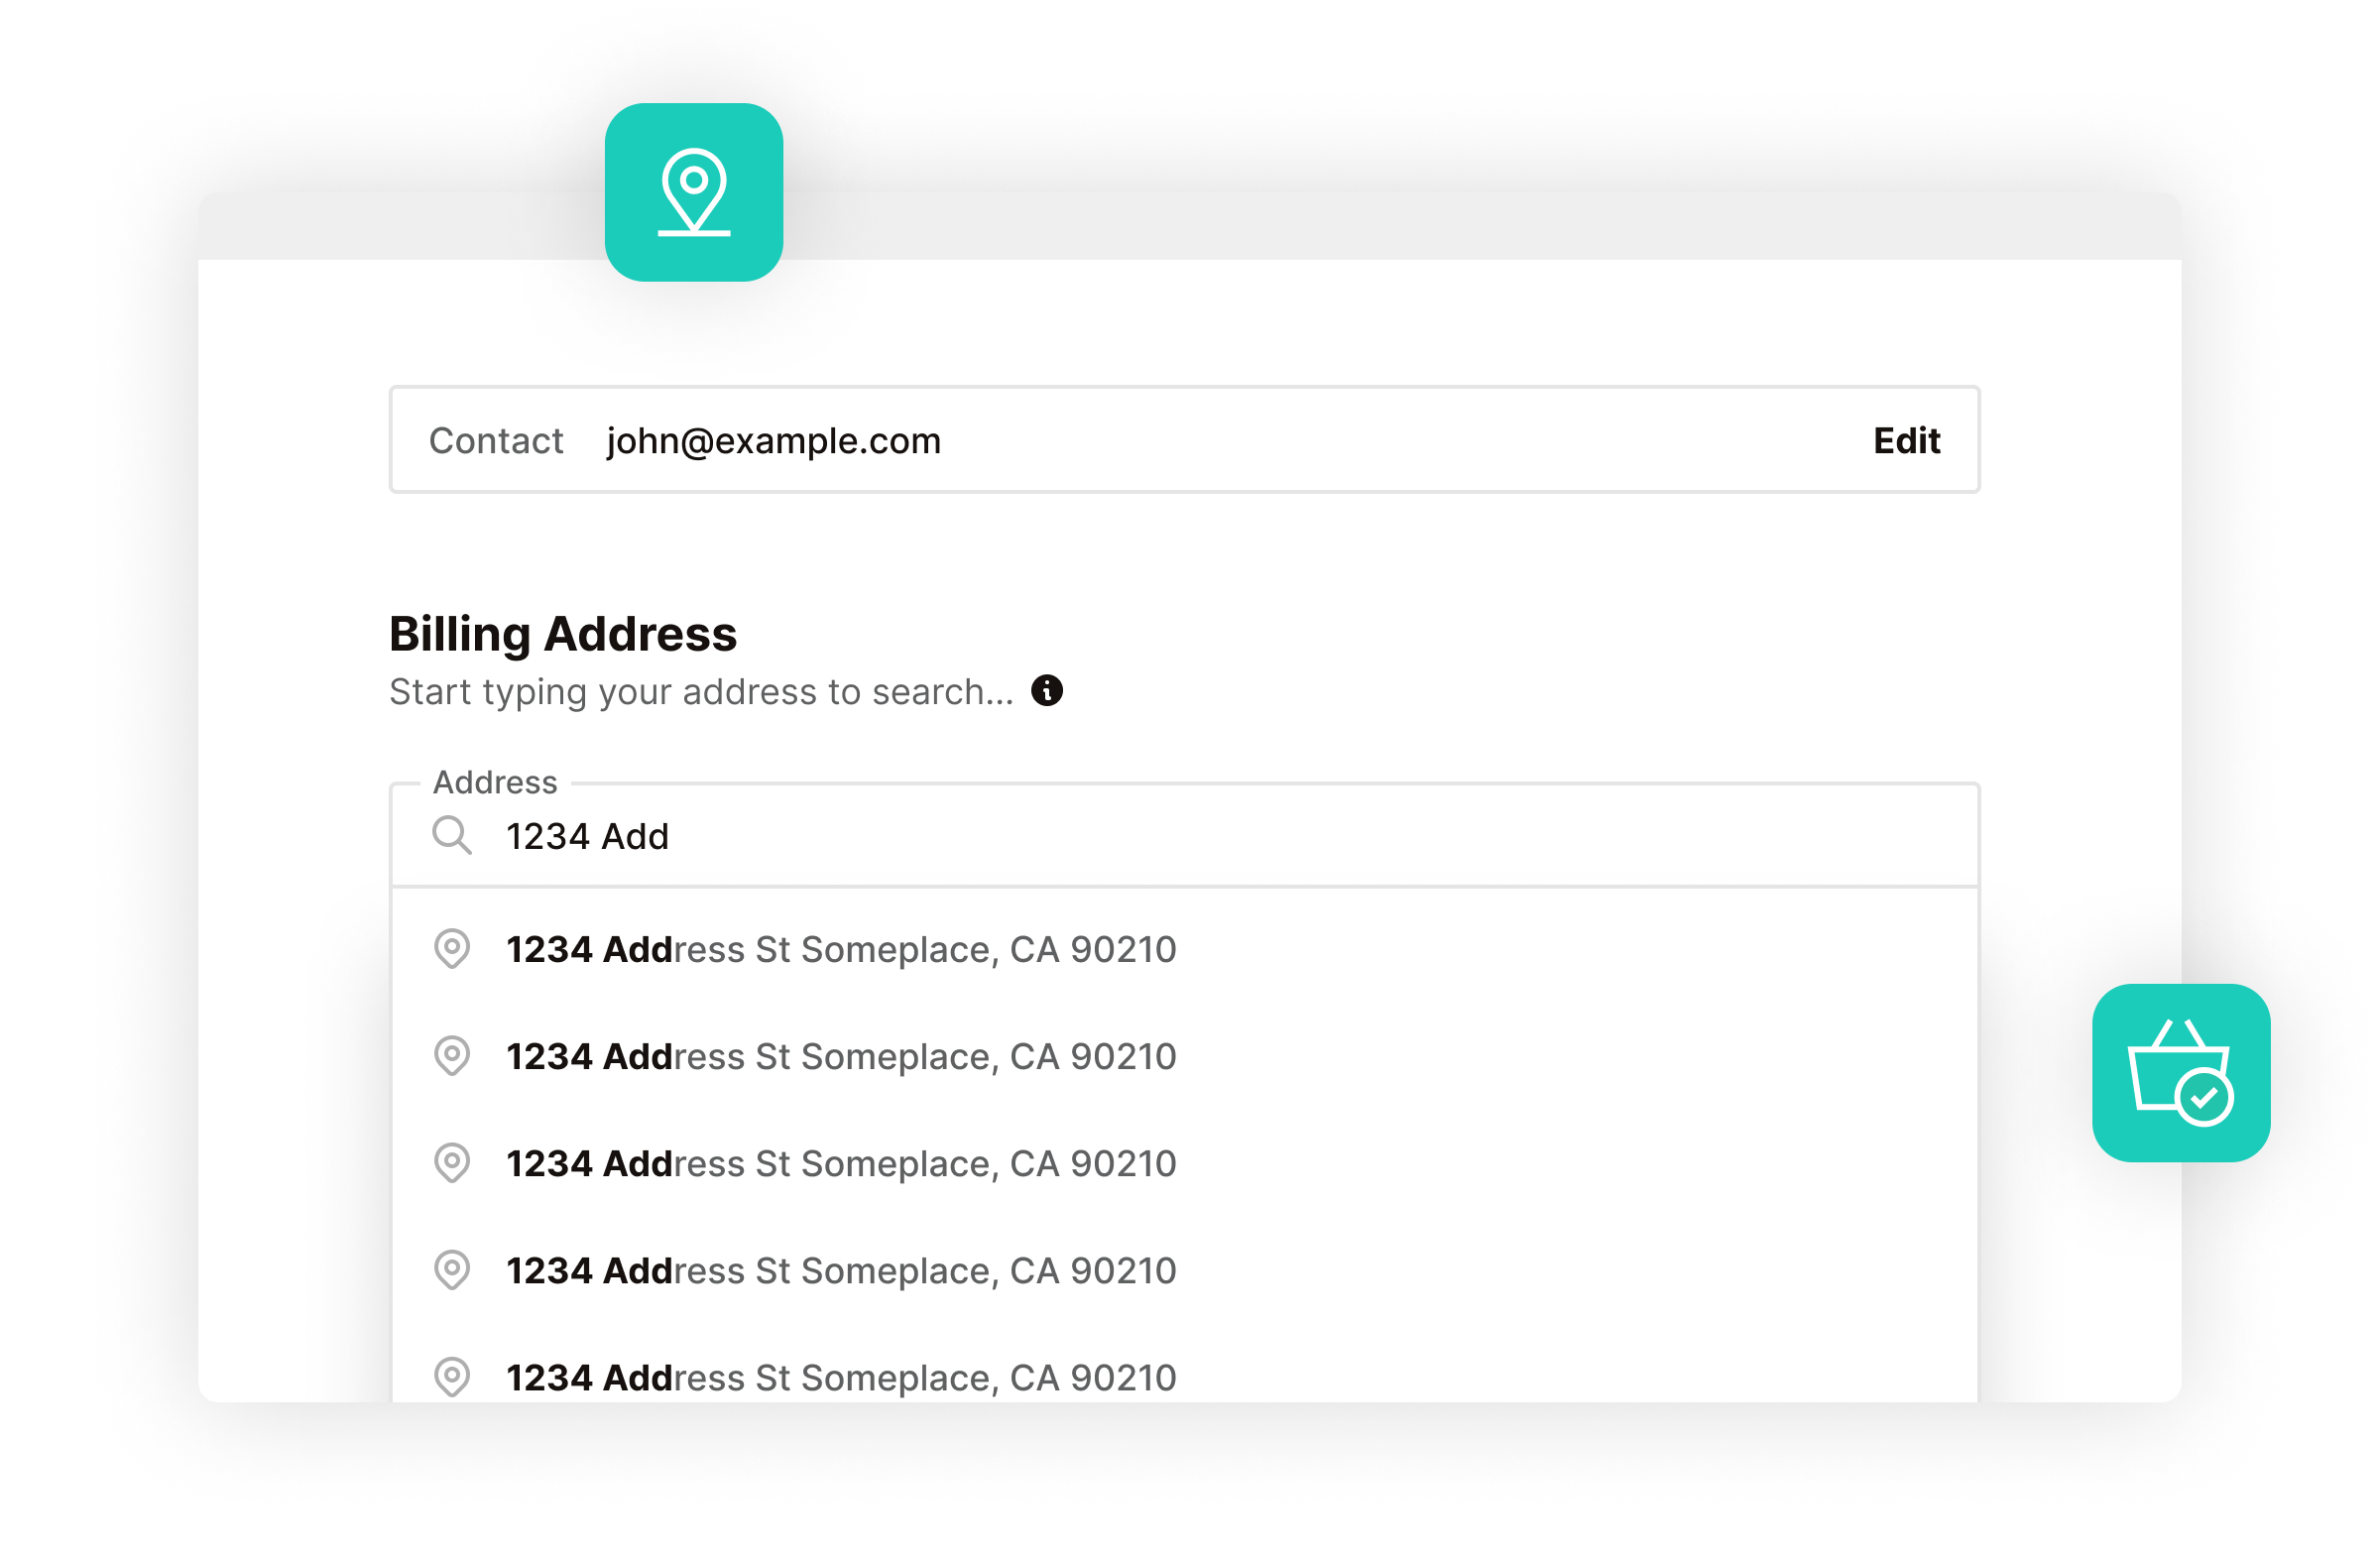
Save Customers Time With Address Autocomplete
- For the best possible user experience, Flux auto-populates all fields once the customer selects their address.
- Avoid customer frustration by not prompting billing and shipping addresses if unnecessary.
- Benefit from a quick and easy set-up using a free Google API key to allow instant address search.
The result is a marvelous and simple checkout process that will boost my sales and cut the drops in the last step.
 Diego Quintero
Ishka Group
Diego Quintero
Ishka Group
Checkout Add-ons
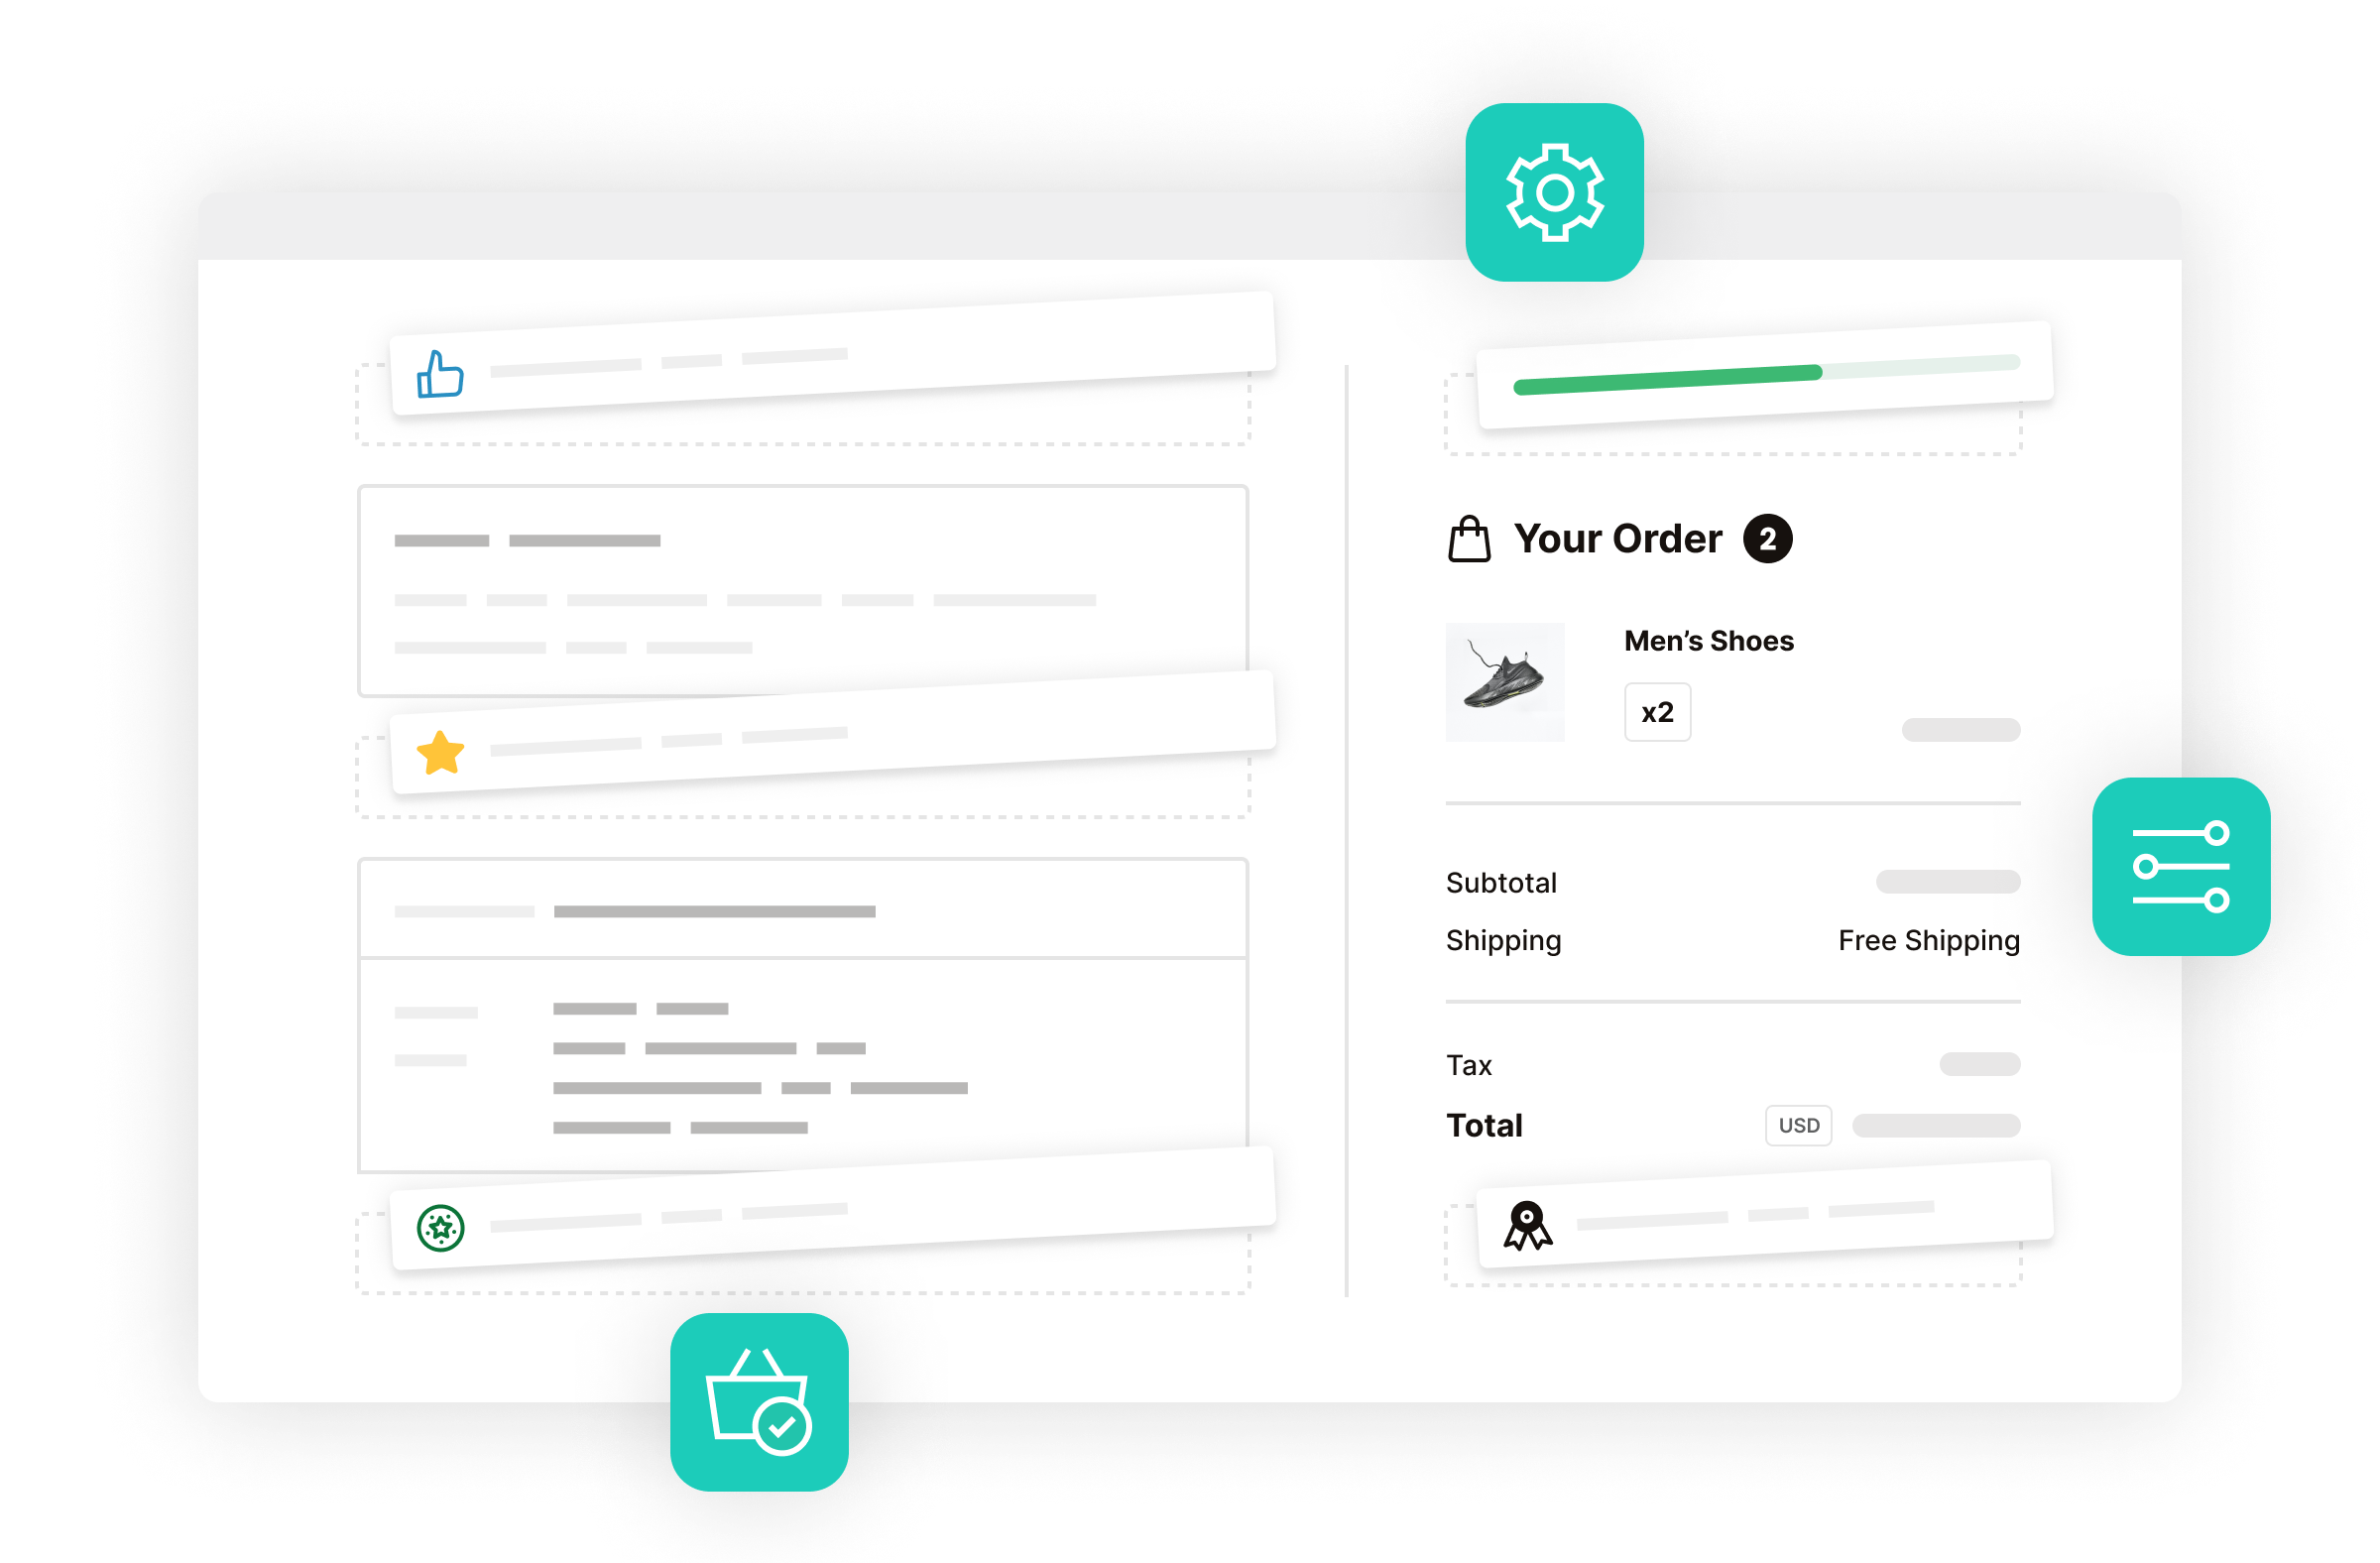
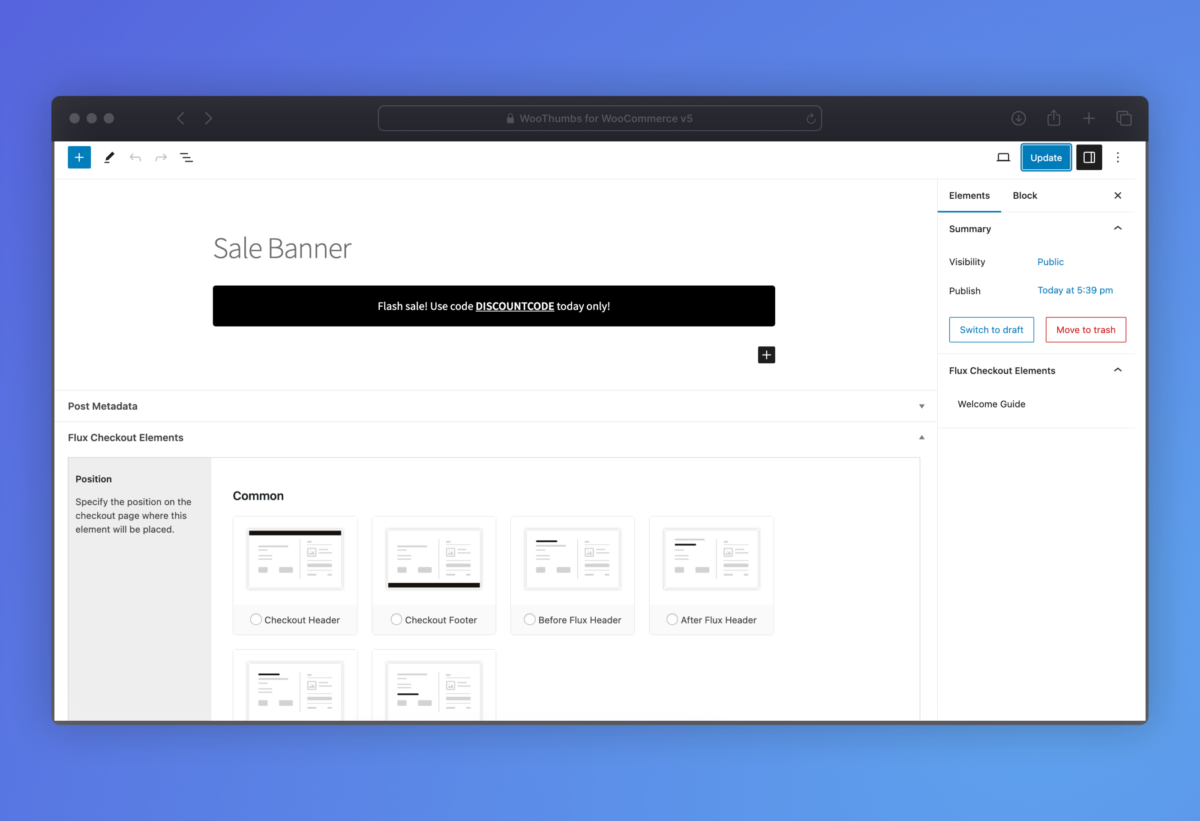
Customize Your WooCommerce Checkout With Elements
- Create custom checkout banners, messages, and interactive blocks with Elements and the WordPress block editor.
- Includes 5+ pre-built Elements you can customize, including banner messages, trust seals, an FAQ, and more.
- Display anywhere on the checkout page with 25+ placement locations.
- Make these conditional based on the customer’s user role, contents, or the cart total.
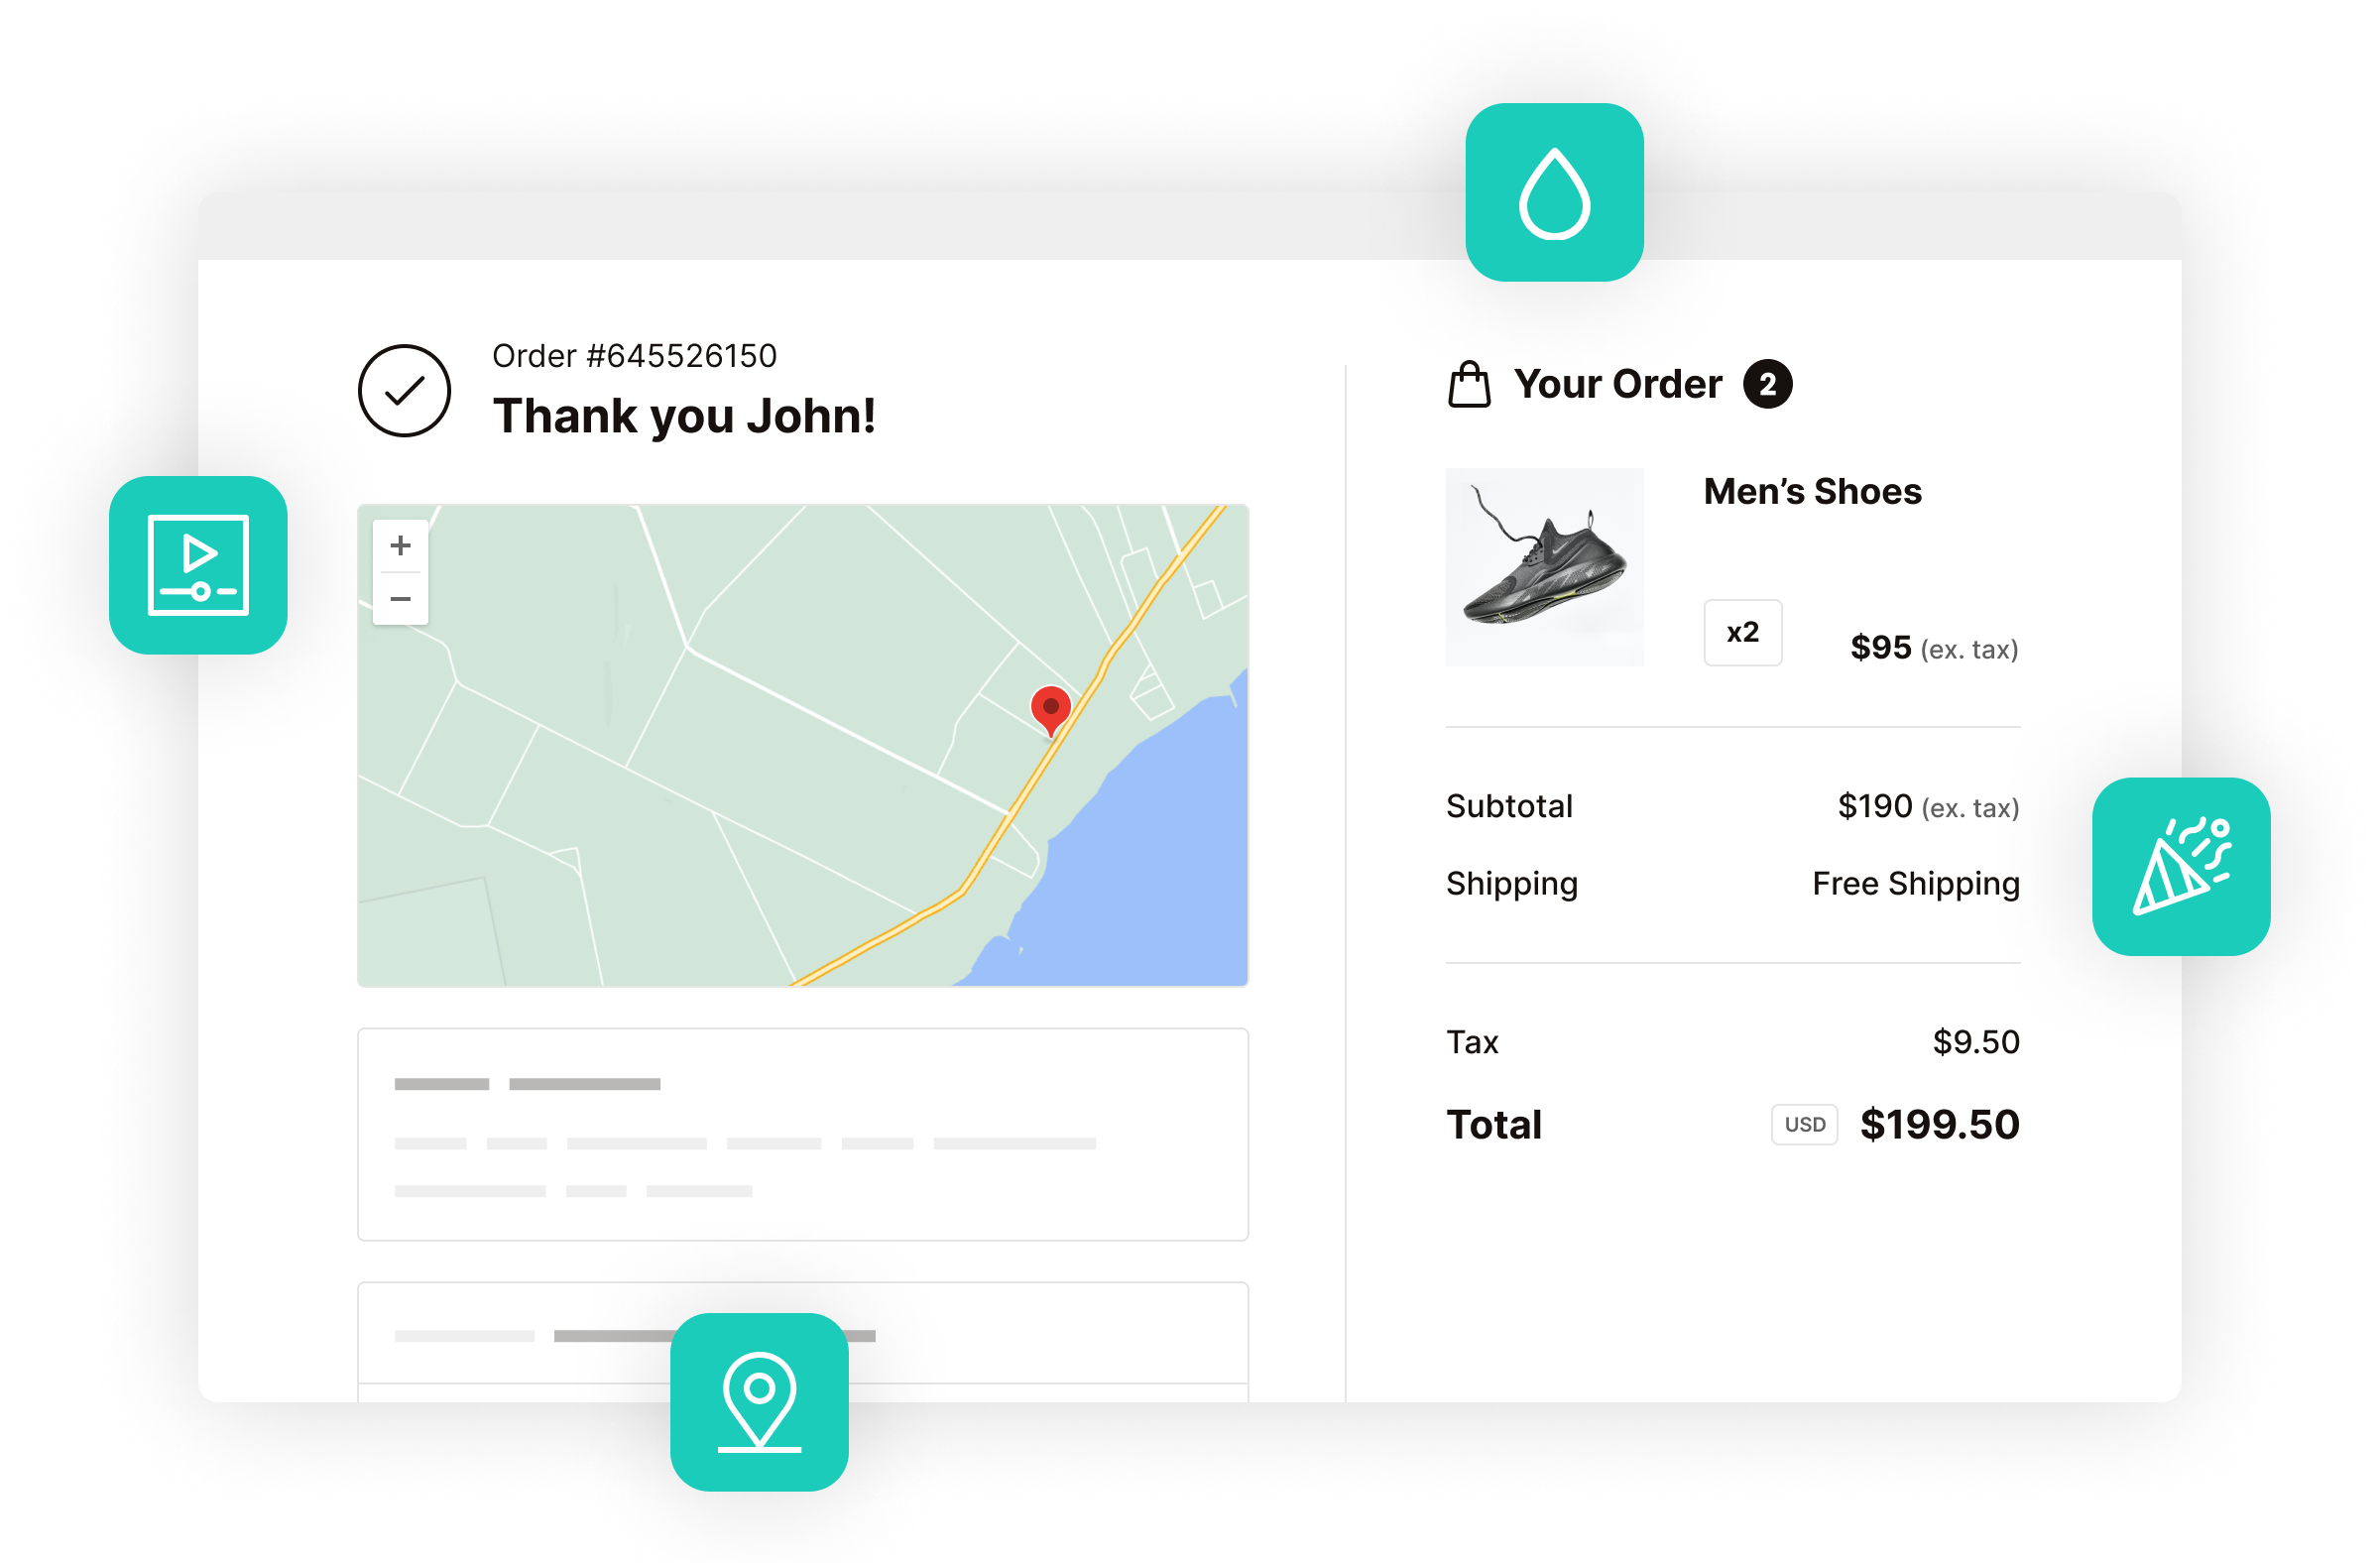
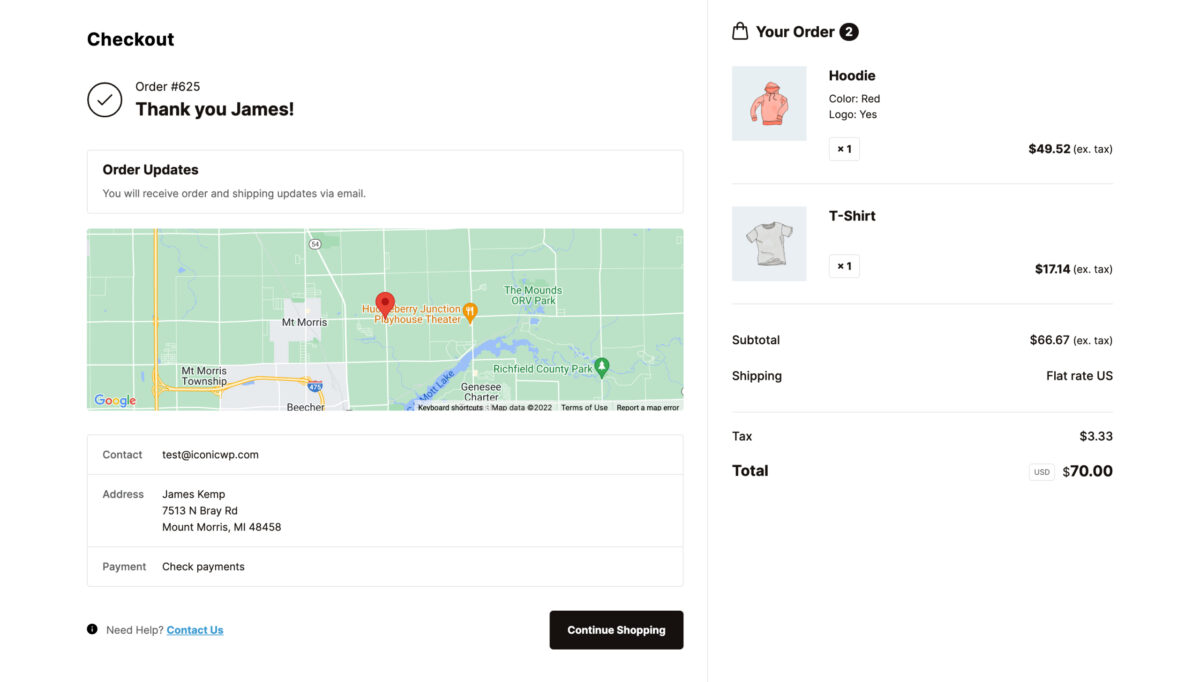
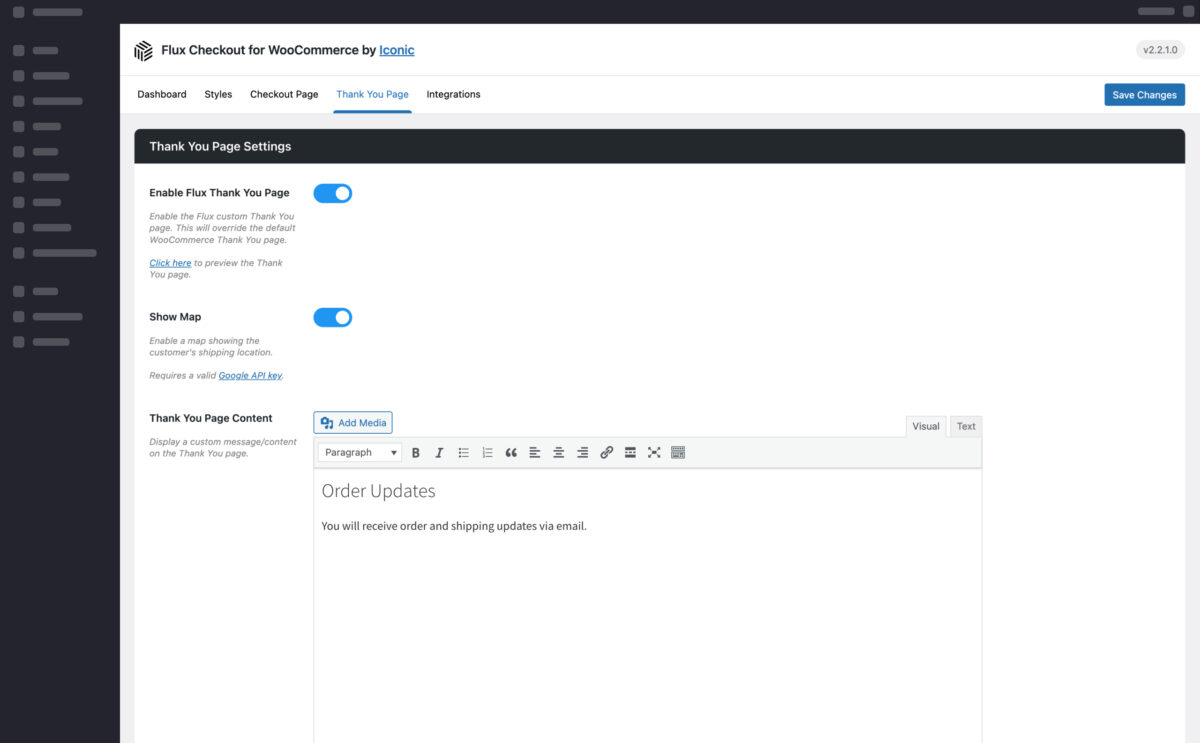
WooCommerce Thank You Page
Customizable Thank You/Order Completion Page
- Replace the default WooCommerce Thank You page with one that’s modern and user-friendly.
- Customizable so you can add your own text, images, video, and more.
- Match the look and style of your checkout.
- Optional customer location map so customers get visual confirmation of their shipping address.
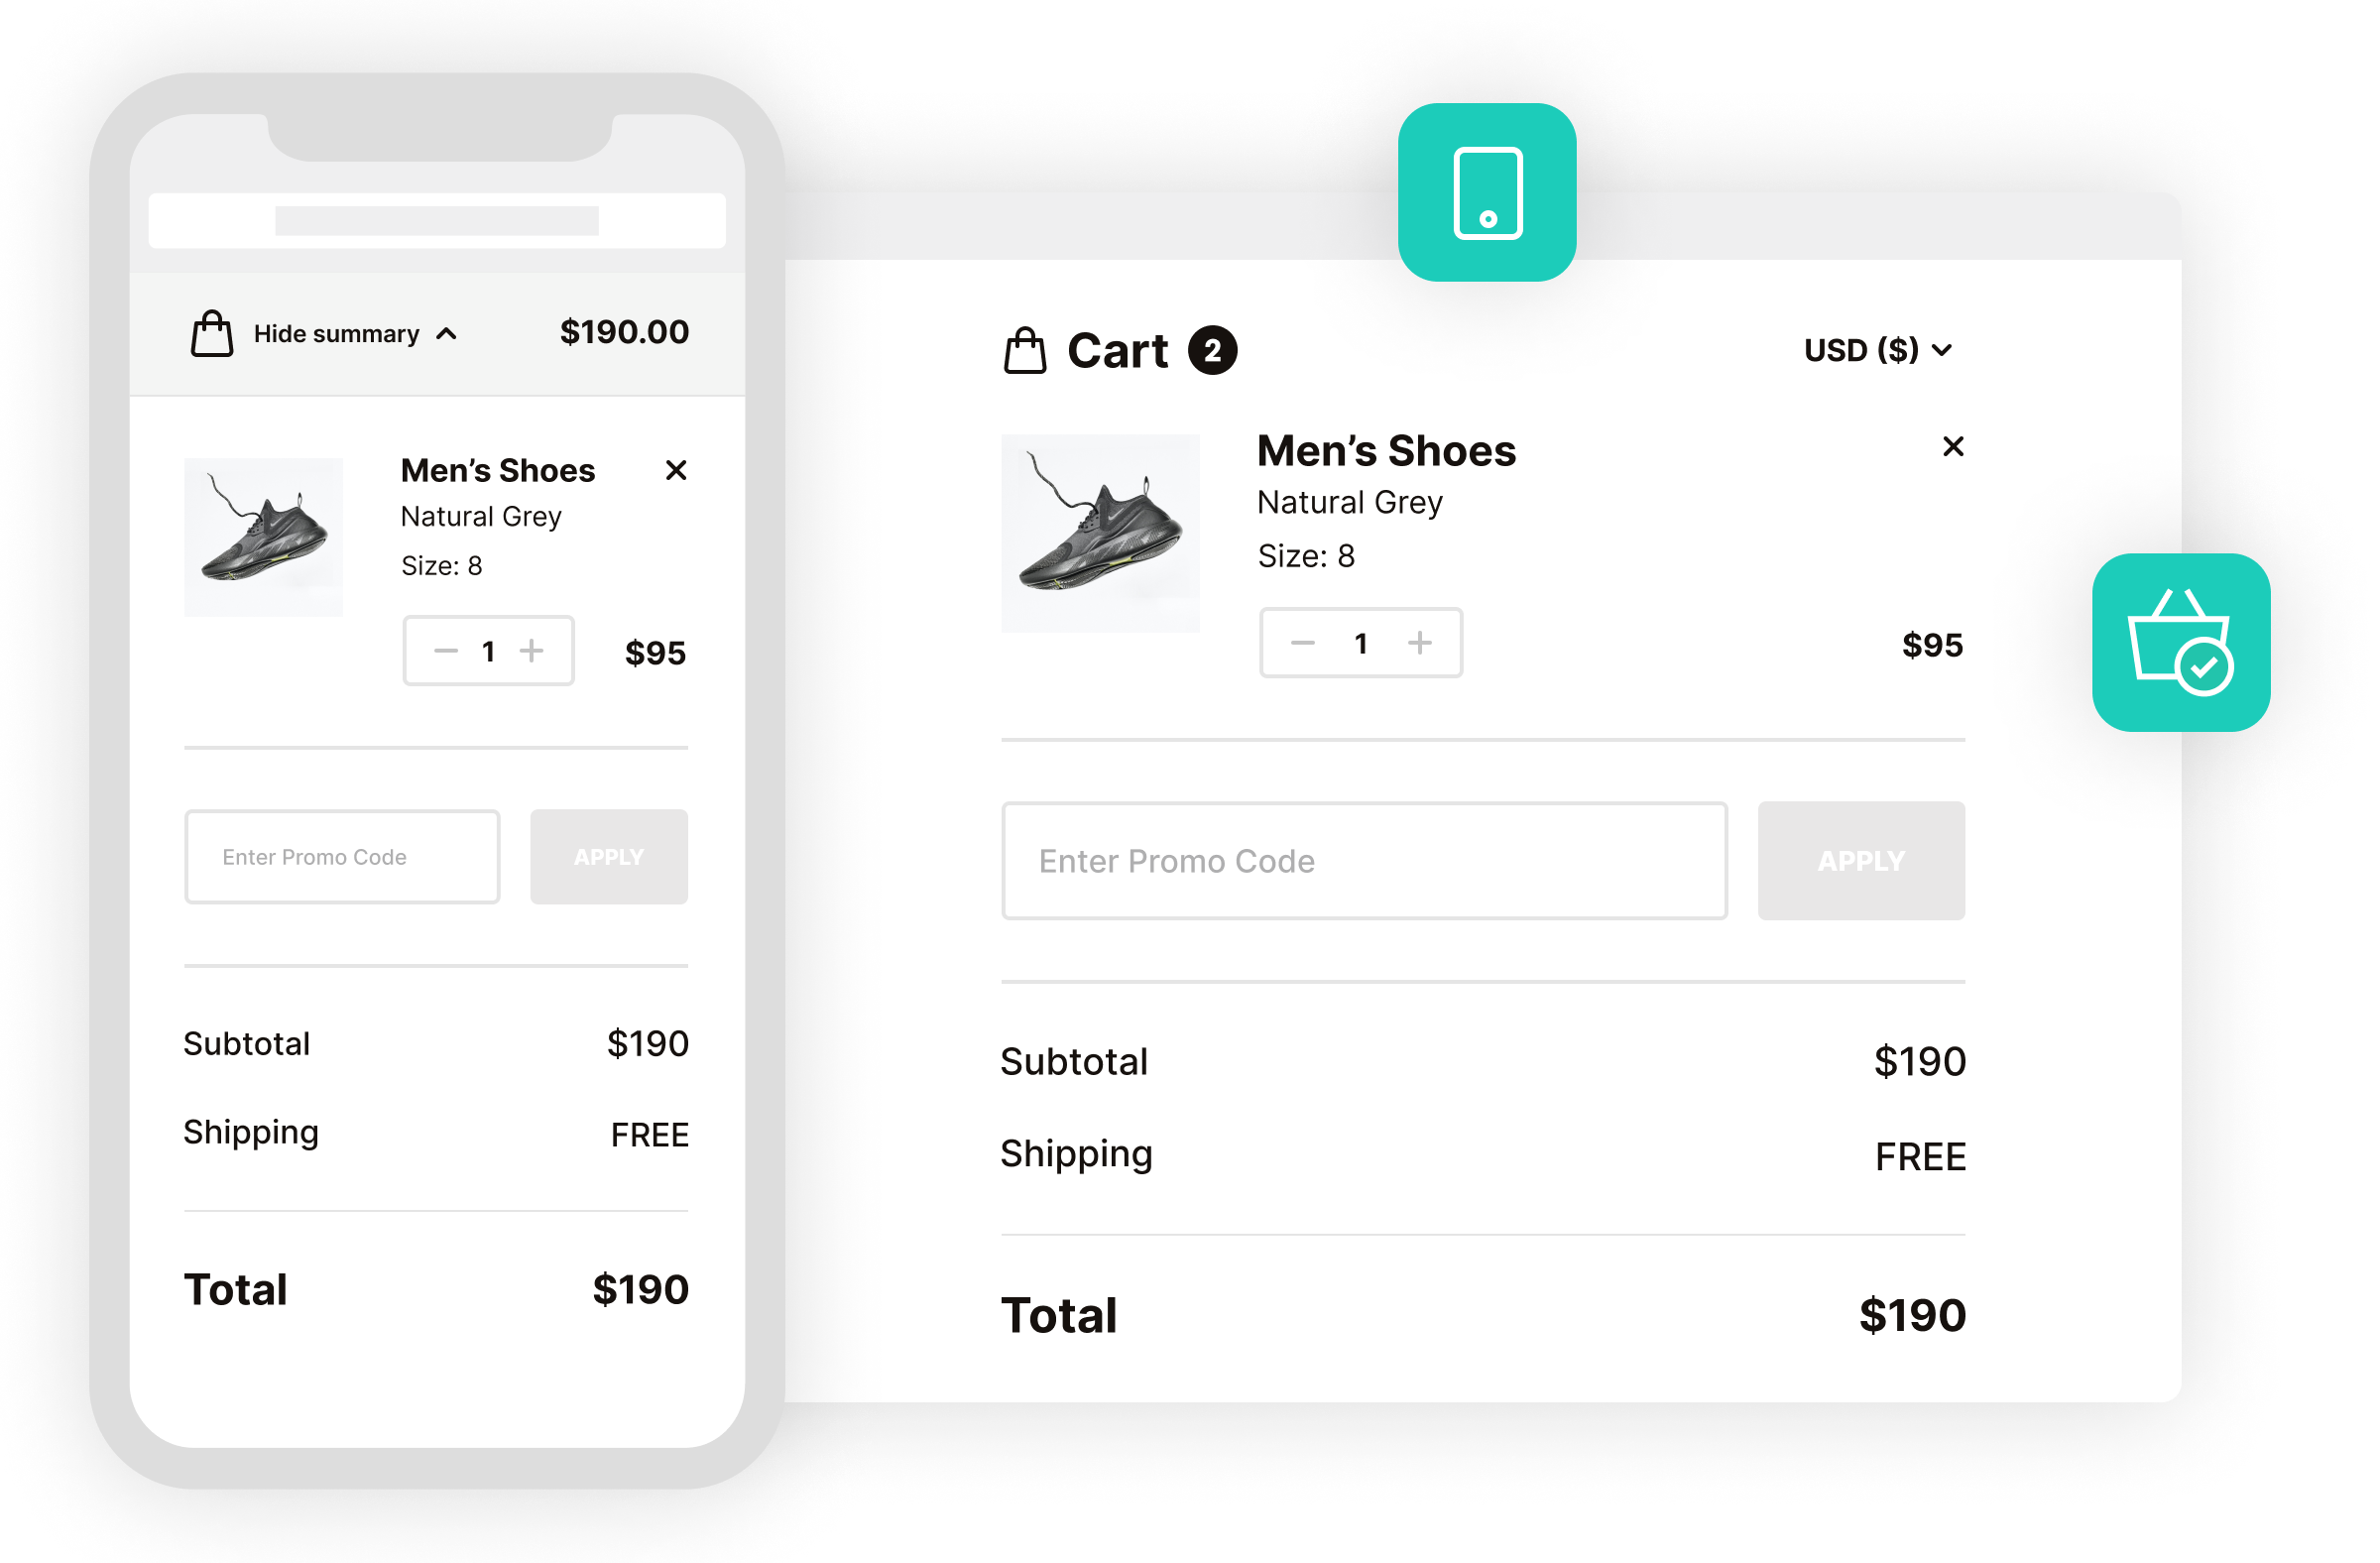
Mobile Optimised
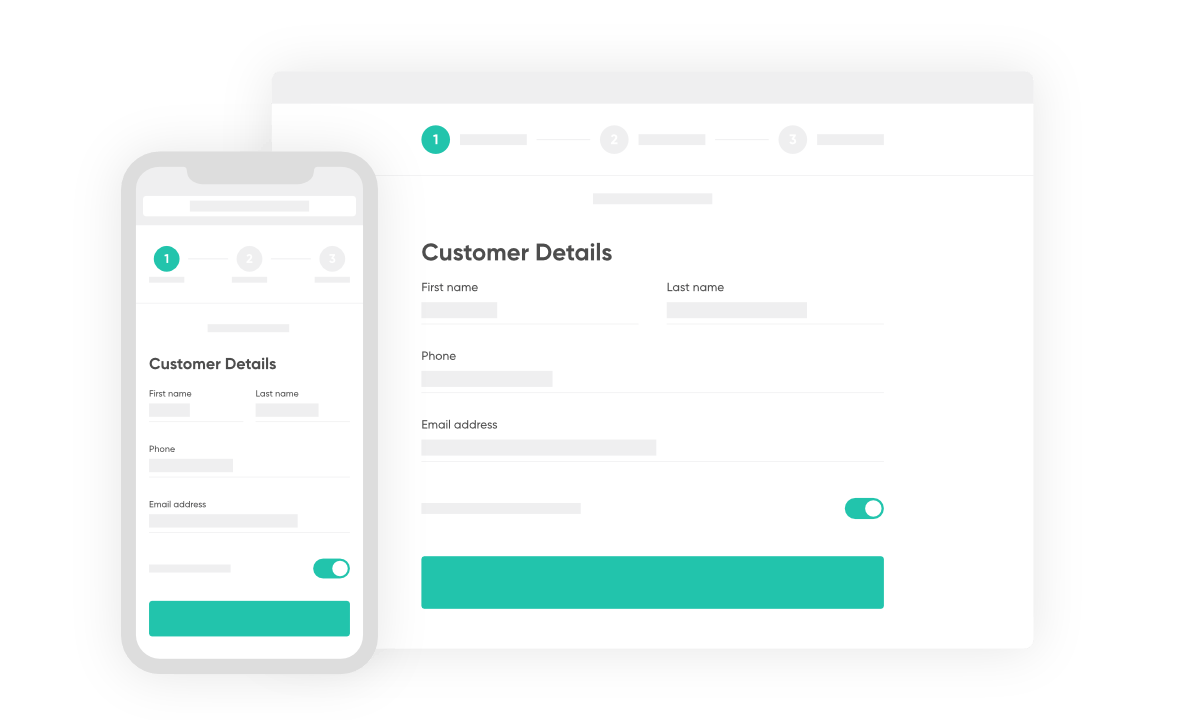
Seamless Checkout on Mobile and Desktop
- Flux doesn’t skip a beat and delivers a quick and easy checkout experience on mobile as well as desktop.
- Decrease abandoned carts with a checkout process that automatically adjusts sizing and layout for mobile devices.
- Offer an improved user experience with unique transitions, modals, and more.
- Your customers will love the collapsable order review with only essential information showing. It won’t get in the way of checking out.
Executed perfectly, it makes the checkout process much more friendly and accessible, especially on mobile.
 Allan Clark
Universal Computing
Allan Clark
Universal Computing
30-day money-back guarantee
Theme compatibility guaranteed
World-class support
More Incredible Features
Flux Checkout for WooCommerce also includes all of the following features — Optimize your WooCommerce store today and increase sales and conversions.
Customer Focused Design
Optimized for a simple and intuitive user experience. With accessible design and useability in mind.
Multi-step Checkout
Make your online store easy to buy from with a distraction-free, clutter-free checkout.
Reduce Cart Abandonment
Improve the default WooCommerce checkout with Flux and effortlessly reduce checkout abandonment in your ecommerce store.
Address Autocomplete
Save your customers’ time by combining six address fields into one and let them get on with their purchase.
Fully Customizable
Customize your chosen theme’s style with color presets, checkout button options, header text, and more.
Add Custom Banners & Trust Seals
Use Flux Checkout Elements to create custom banners, trust seals, and more. Display depending on the user role, cart contents, and/or cart total.
Better Account Creation
Make account or guest checkout easier with Flux’s account creation checkbox prompts that don’t slow down the WooCommerce checkout process.
Page Builder and Theme Compatible
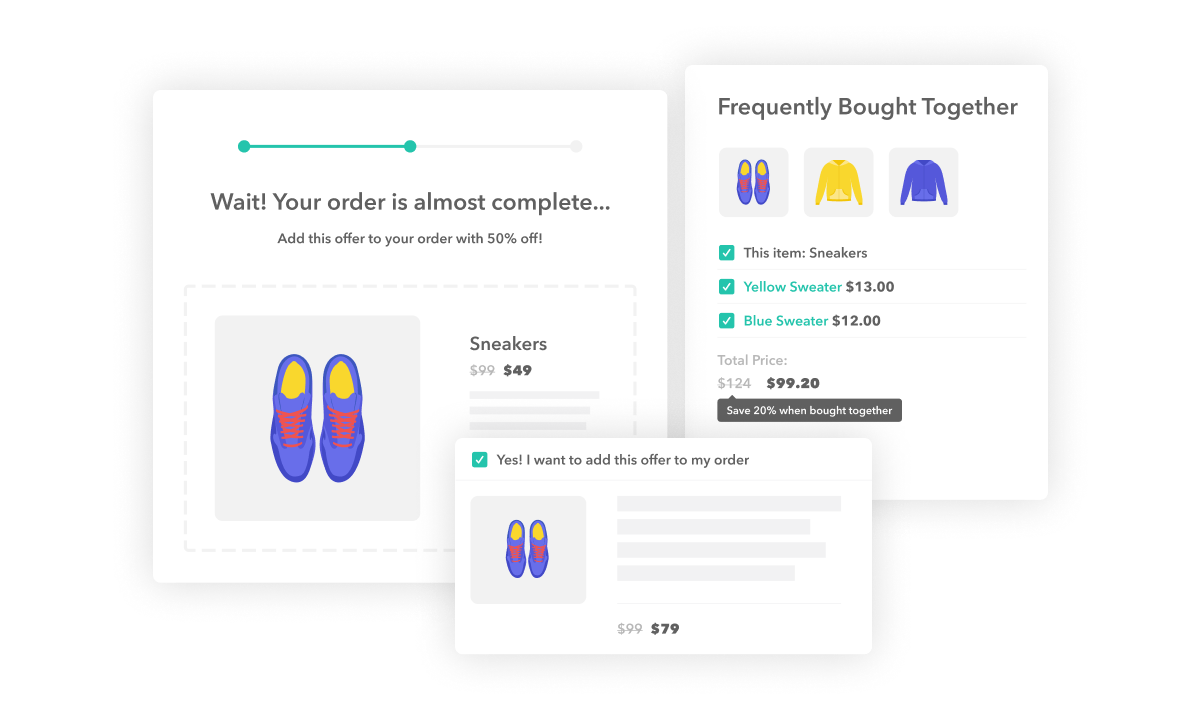
Compatible with any well-coded WordPress theme and many 3rd-party WordPress plugins and page builders. Including upsell and cross-sell plugins, payment gateways, and more.
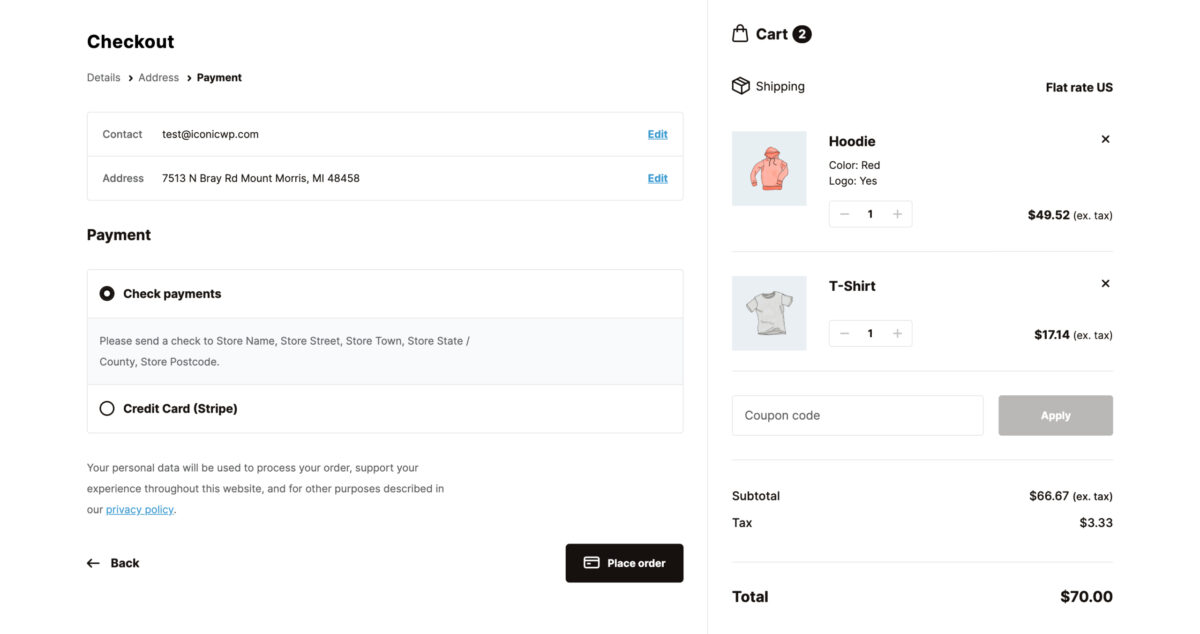
Use Any Payment Method
Flux Checkout for WooCommerce is compatible with all default WooCommerce payment options and any additional WooCommerce payment plugins you add (Stripe, PayPal, WooPayments, and more).
Mobile Friendly
An app-like experience that goes far beyond the standard responsive layout.
Easy Setup
Install, customize, and watch as your conversions increase.
Integrated Functionality
Seamlessly integrates into your theme. Flux uses the default WooCommerce checkout hooks and filters.
Screenshots
See how Flux Checkout for WooCommerce looks for both customers and admin users.


Choose Your License
Which plan is right for you? Whichever one you choose, you’ll get access to this incredible plugin and our 5-star support.
Product License
14+ Sales-Boosting Plugins From Only $299
Get this plugin and more when you join the All Access club. Instantly increase your store’s selling power and usability.
Bundle up.
Get Iconic Sales Booster, Flux Checkout, and WooThumbs for only $257 $149 with our WooCommerce Conversions Bundle.
 Iconic Sales Booster
 Flux Checkout


100% No-Risk Money Back Guarantee
You are fully protected by our 100% Money Back Guarantee. If you aren’t completely satisfied within 30 days of purchase, you’re more than welcome to a full refund!
- Version: 2.10.0
- Updated: 20 Mar 2024
- Released: 7 Nov 2018
- WordPress: 6.4
- WooCommerce: 8.7.0
- View Changelog
Frequently Asked Questions
Have you got a question about Flux Checkout for WooCommerce? Check out some of the most popular questions and answers below.
-
Which devices does Flux Checkout work on?
Any desktop computer or mobile on device’s such as an iPhone, Android, iPad, etc.
-
How does the address autocomplete work?
Flux Checkout uses the Google Maps API to power the instant search functionality. You will need to obtain your own free API key to use this feature.
-
My checkout already uses an address autocomplete plugin?
You can disable our address autocomplete functionality and Flux Checkout is compatible with the popular address autocomplete plugins currently on the market.
-
Is it translation ready?
The front and back-end of Flux Checkout is completely translation ready and it comes with 12 translations including German, French, Spanish, Dutch and more.
-
Can I change the domain associated to the license?
Yes. Our system checks against the number of active installs, rather than the specific domain names. You can deactivate the plugin on one domain and then activate it on another domain with no issues.
-
Can I still use the plugin when my licence expires?
If you purchased an annual license, then yes, you can still use the plugin in its full capacity even after your license expires. However, you will no longer be able to receive updates or support for the plugin.
-
Can I use my licence in a development environment?
Yes. Most development environments will not count towards your site limit.
-
Do you offer lifetime licenses?
No. We do not offer any lifetime licenses for our plugins.
-
Do you offer refunds?
Yes, if you decide within 30 days of purchase our plugin is not for you, we’ll happily refund you in full.
-
Do you offer a free trial?
No, however, we do have a 30-day money-back guarantee. If you decide within 30 days of purchase our plugin is not for you, we’ll happily refund you in full.
-
Do you offer multi-site licenses?
Yes, we do (and they’re heavily discounted)! When the checkout modal opens you can choose between 1 Site, 3 Sites, and 30 Sites under Plan Selected at the top. If you have any other requirements, please get in touch via our support page.
-
Is this a lifetime licence, or will it stop working after 1 year?
The license is an annual subscription. It can be canceled at any time. If you cancel the subscription, the plugin will continue to work as normal until the end of the paid-for period.
Once the license expires or is canceled, you will no longer receive updates or support for the plugin.
After expiration or cancellation, the plugin will continue to work on your site.
-
Why do I need a subscription?
WooCommerce is evolving constantly. A subscription model allows us to continue supporting the latest releases and offer the best support we can.
-
Will it work with my theme?
All Iconic plugins are tested in multiple WooCommerce themes. As long as your theme is well coded and WooCommerce compatible, it will work. If there are any issues, we’re more than happy to try and fix them; just get in touch.
-
Will my subscription renew automatically?
Yes, your subscription will renew automatically every year, unless you cancel it. If you do decide to cancel it, your license will still be valid for the paid-for period; this means you will still receive updates and support during that time.
-
Do you offer monthly plans?
No, not for single plugins; we only offer annual plans. For bundles, we do offer monthly and annual plans.
Customer Reviews
Very good support
I had some problems and custom changes in the plugin and the support team fixed it asap 🙂
Great support
I got a conflict with my website and many other issues they supported immediately with all what I need and more .. thank you
An essential plugin for WordPress
A simple idea executed perfectly, makes the checkout process much more friendly and accessible especially with mobiles. Address autocomplete is a nice touch and makes such a difference. Support was instant, friendly and effective. Well done guys!
Increases conversion rates
Excellent plugin, great support. Definitely seen an increase in conversation rates when using this. Simplifies the checkout process for the customer.
Great Product and Great Support & Service
Solid product, makes the process very smooth and simple for your customers, plus responsive reliable support to back it up. There was some challenges with integration with some other non-standard Plugins, and Flux Checkout were able to work with the other Developers involved to address all the issues without fuss. Just what you want to happen as a customer!